- March 29th, 2012
- /
- Design Tips, Do-it-yourself Invitations, Pocketfold®
- /
- 2 Comments
- /
- {Designer Tools} Templates
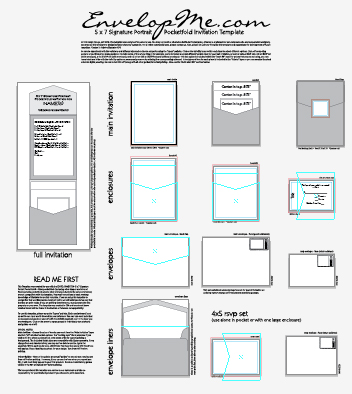
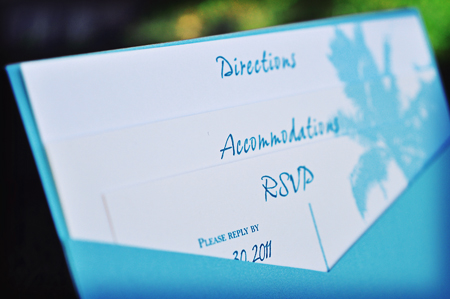
Ever wonder how you can create those perfect waterfall inserts in your own DIY pocketfold invitation? You can leave those complicated math calculations to us – and just use one of our FREE invitation templates instead.
For all our DIY-ers, we are excited to bring these new FREE Downloadable templates as design tools to our website. You are one-of-a-kind, and we know you want an invitation that is as unique and individual as you are. So, our templates are a “blank slate,” if you will, designed to take the stress out of math and sizing calculations, while leaving all the creativity up to you.
We have been working hard to put these new templates together and hope you find them helpful. We have templates for the casual user to print at home (MS Word) and for the professional designer preparing files for commercial printing (Adobe Illustrator). We don’t have every size available yet, so if you don’t see what you’re looking for, just ask.
MS Word Templates
for Envelopments® Pocketfold® Invitations
Our first set of templates is created in Microsoft Word – a nearly universal program – to give anyone a simple way to design an invitation to print at home. Each set is created to print on 8.5 x 11 paper, then cut out after printing. Templates for several different pocketfolds are available. Be sure to choose the correct template for the pocketfolds you are ordering, as each is slightly different.
Note: Our MS Word templates are intended for printing at home, and are not for commercial printing. If you’d like to have us print your invitations, we will design them for you at no extra charge.
Download your free MS Word invitation templates here.
Technical users, read on… Casual users, you can just skip ahead to the “resources” section.
Adobe Illustrator Templates
for Envelopments® Pocketfold® Invitations
Our new Illustrator templates were created for design professionals, and particularly for commercial printing, although you could certainly use these to print at home as well. These templates require Adobe Illustrator software to use, and you must have at a minimum a basic knowledge of working with layers in Illustrator in order to use them. If we’re printing your invitations, contact us for specific information on preparing your file.
Once you open the template file, you’ll see many options within each labeled layer, so be sure to look around and try turning different layer options on and off to create your perfect invitation. These templates also include guides to show how to layer your cards in the pocket, and options for different sized borders. More advanced users can change pieces to fit their specific needs, but keep in mind these are already sized to fit the pocketfolds. If we’re printing your invitations, contact us for specific information on preparing your file.
Download your free Illustrator invitation templates here. (Scroll down to the middle of the page.)
What about templates for Photoshop, InDesign, or other design software?
Photoshop is a fantastic design tool to manipulate and process photos, but it’s not really the right tool for the job for most text-based invitations that are slated for commercial printing. Even if you love Photoshop, it’s so much easier to start in Illustrator than to export and fix a file that was started in Photoshop. If you are having us print your invitations, please just trust us on this and use Illustrator or InDesign. (If you are printing at home, of course, you can use whatever program you like :-))
We love InDesign for invitation design, and if we’re designing your invitation, this is the program we use. However, it was easier to create a self-explanatory template in Illustrator and this seems to be the program that many of our brides use, so we started there. You can certainly set up sizes and guides you like in Illustrator using the PDF version of the template, then bring in the individual .pdf files into InDesign as a guide. Perhaps this strategy would work for Quark or Corel users as well. (We don’t have either of those platforms, so you’ll be on your own there.) Try them out and let us know what you think!
Resources for Designing Your Own Invitations
All our templates are blank so you can create whatever you can imagine. Here are some resources to assist you in finding the perfect fonts and artwork for your custom invitation.
Click on one of the Inspiration gallery links above if you are in need of a little inspiration.
Fonts
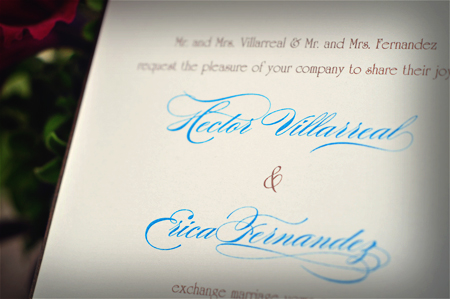
The fonts you select set the mood for your entire event, whether it be formal, casual, rustic, retro, modern… This first link features many of our invitation fonts with links to purchase or download each one.
Here are links to our three favorite places to buy fonts. These paid sites, including Myfonts.com, Fonts.com, and Veer.com are all trusted sources, with whom we are affiliates and regularly purchase fonts from ourselves.
www.myfonts.com – our favorite – carries most of the fonts from many font foundries
www.fonts.com – also a good resource and carries a large selection
www.veer.com – gorgeous fonts that you often cannot find elsewhere (a little pricey, but amazing – check out Burgues, Compendium, Adios, Feel, & Hiatus to name a few.)
If your are looking for something a little retro and quite uncommon, try this site (interesting old-style fonts and lots of unique frames):
There are many free font resources as well. Some are safer than others. We do like this one, which features many lovely fonts, and we’ve had good luck with it:
Artwork
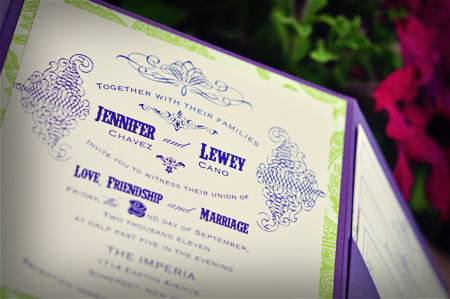
Artwork can add so much to your invitation design, if you can find what you are looking for. Sometimes quality artwork is hard to find, but here is one of our favorite affiliate resources, our go-to sites for invitation images. (Don’t forget to look at the font resources above for artwork, too. There are several fonts that feature lovely scrolls and flourishes instead of or in addition to the alphabets, as in the image above. Veer, also listed above, sells illustrations in addition to fonts.)
The important thing to remember about images from istock is that if you want us to print, we need the “vector” file, usually an .eps or .ai file type to be able to print it. You can narrow your keyword sort to “Illustrations” to keep the photos out of your search. The prices will vary per image; it just depends on what you want.
There are some good free resources on the internet as well, and these two we’ve been happy with. Both of these sites also contains links to other paid sites with similar offerings, in addition to the free content they provide. Sometimes it’s tricky to separate the free items from the paid links, but be patient and you might find something you love.
The artwork on the All-silhouettes.com site often comes in sets and is easier to work with if you are using Illustrator, so you can manipulate the item that you want. The all-free-download.com site has some individual images and some groups. If you’re using MS Word, keep in mind that file types specifically designed for Word will print better for you (try .jpg or .png files, rather than those designed for Illustrator). There are many other sites offering vector images in addition to what is listed here, but these will give you a place to start.
Hope that helps! Please contact us if you have questions… we have real, live people here to assist you with all your invitation needs!


Hi,
Love your templates! I’m using the 5’x7′ landscape template to create my invitations. I was wondering if on the template for the inserts/RSVP, you can delete or get rid of the double-line that is directly under the title (I.e. Directions, RSVP)? I don’t want that to appear on the invitations.
Thank you for your help!
Hi Mya,
Are you using the Illustrator or the Word template?
For Illustrator: You can go under the “Layers” palette in Illustrator and turn on/off any lines you don’t want to see. Be sure to build your design in the new layer above the “guides” layer, and then turn off the entire guides layer when you’re ready to print.
For MS Word templates: Have your cursor in the box you want to change. Go to the “Borders” Palette. Pull down the “TYPE” box, and select the border option that turns off all borders (image of a dotted line all the way around perimeter and both directions inside the box). This will make sense when you are actually doing it in the program. I recommend printing one of each with the lines on so you can see where to cut, then turning them off for the rest of the invitation printing. You’ll have to either select the whole page (all the boxes on the page) to turn off all the lines on that page at once, or go into each box individually and turn them off. You have to go page by page. It will not work if you select the whole document.
Hope that helps!